SPOT VACUUMS: THE HEROES OF CLEANING
Why Spot Vacuums Are Your Best Friends
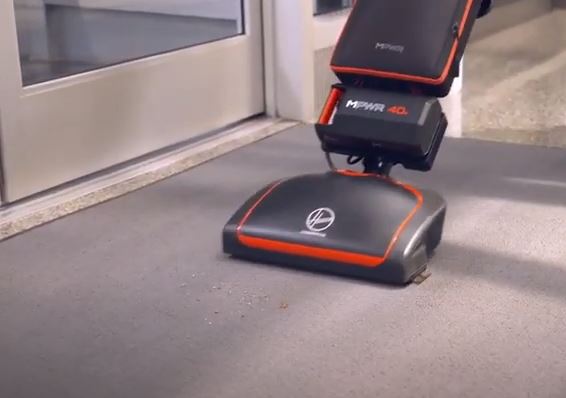
Spot vacuums shine when messes appear. Think of them as the trusty sidekick always ready to tackle spills and crumbs. Compact and nimble, they fit into tight spaces where traditional vacuums struggle. No need to haul out the heavy artillery for small mishaps. Just grab the spot vacuum, and voilà! Clean surfaces in a jiffy.
The Hidden Benefits of Spot Vacuums
Beyond quick clean-ups, spot vacuums offer a treasure trove of advantages. They save time, allowing more moments for relaxation or fun. Their lightweight design means less strain on the back, making cleaning less of a chore. Plus, many models come equipped with specialized attachments for various surfaces, from carpets to upholstery. Versatility reigns supreme, making these devices invaluable in any home.
Common Odor Sources in Spot Vacuums
Spot vacuums, whilst champions of cleanliness, can sometimes harbor unpleasant odors. Leftover food particles and pet hair often contribute to these smells. Regular maintenance is key. Emptying the dustbin after each use prevents buildup, and washing filters keeps the air fresh. A little vinegar or baking soda can work wonders for deodorizing, turning a potential stinky situation into a breath of fresh air.
THE SCIENCE OF ODOR: WHY IT HAPPENS
The Role of Moisture in Odor Production
Moisture plays a sneaky role in creating odors. Damp environments serve as breeding grounds for bacteria and mold, both of which thrive in wet conditions. Think of moisture as the secret ingredient in a recipe for unpleasant scents. Keeping carpets and upholstery dry can significantly reduce odor issues. A dehumidifier or simply ensuring proper ventilation can work wonders in maintaining a fresh atmosphere.
Bacteria and Your Spot Vacuum: A Love-Hate Relationship
Bacteria often get a bad rap, but not all bacteria are foes. Some bacteria are essential for breaking down organic matter. Notwithstanding, when a vacuum cleaner sucks up food debris, the real trouble begins. Bacteria feast on these leftovers, producing odors as a byproduct. Regularly cleaning vacuum filters and canisters helps keep this relationship in check. A simple rinse or wash can prevent those unwanted scents from wafting around the house.
How Food Particles Become Odor Villains
Food particles lurking in carpets or under furniture can turn into odor villains quicker than a cat can pounce. Crumbs from snacks, spills from drinks, and remnants of dinner can all contribute to a smelly situation. Once these particles settle, they become a buffet for odor-causing bacteria. Regular vacuuming removes these culprits before they can wreak havoc. For stubborn stains, a targeted spot cleaner can save the day, ensuring the home remains a fragrant sanctuary.
PREVENTIVE MEASURES: KEEPING ODORS AT BAY
Regular Maintenance: Your Vacuum’s Best Defense
Regular maintenance acts like a shield against pesky odors. A quick check of filters, brushes, and hoses ensures they remain free from dust and debris. Cleaning filters monthly can prevent musty smells from creeping in. Brushes need a good scrub, too; tangled hair and dirt can turn any vacuum into a smelly beast. Just like a car needs oil changes, a vacuum thrives on consistent care.
Choosing the Right Cleaning Solution
Choosing the right cleaning solution is akin to picking the perfect seasoning for a dish. Not all cleaners are created equal. Some may mask odors temporarily but leave residue that attracts more dirt. Opt for enzymatic cleaners; they break down organic matter, eliminating odors at the source. Always test a small area before diving in; nobody wants a surprise when tackling those stubborn stains.
The Importance of Emptying the Tank
Emptying the tank is a no-brainer, yet often overlooked. A full tank is like a sponge soaked in water—eventually, it will start to smell. After every use, dumping the contents keeps the vacuum fresh and ready for action. A quick rinse of the tank, if washable, can work wonders. Think of it as giving the vacuum a refreshing drink after a hard day’s work.

DIY ODOR ELIMINATORS: HOMEMADE SOLUTIONS
1. Vinegar and Baking Soda: The Dynamic Duo
Mixing vinegar and baking soda creates a fizzy reaction that tackles odors like a pro. This combo works wonders on carpets and upholstery. Just sprinkle baking soda, spray vinegar, and watch the magic unfold. The bubbling action lifts dirt and smells, leaving freshness in its wake.
2. Essential Oils: Adding a Pleasant Twist
Essential oils transform the ordinary into extraordinary. A few drops of lavender or lemon oil in a diffuser can brighten up any room. For an instant refresher, mix oils with water in a spray bottle. A spritz here and there not only masks odors but also uplifts the mood, turning a dull space into a fragrant oasis.
3. Activated Charcoal: Nature’s Odor Absorber
Activated charcoal is like a sponge for bad smells. Place it in small bags around the house, and it silently works its magic. This powerhouse absorbs moisture and odors, making it ideal for closets or the fridge. Unlike air fresheners that just cover up smells, activated charcoal eliminates them, ensuring a breath of fresh air.
SPOT VACUUM ETIQUETTE: USING IT RIGHT
Techniques for Maximum Effectiveness
Mastering the art of spot vacuuming demands finesse. Start by identifying the trouble spots—those pesky crumbs and stubborn stains. A swift back-and-forth motion works wonders, ensuring dirt doesn’t stand a chance. For stubborn spots, employing a circular scrubbing technique can lift grime like magic. Remember, a clean surface isn’t just about looks; it’s about creating a welcoming space.
Timing: When to Spot Vacuum for Best Results
Timing can make or break the spot vacuuming experience. Early mornings or after meals often present the best opportunities. Dust and debris tend to settle, making it easier to tackle messes. Plus, catching spills right away prevents them from becoming permanent residents on carpets or floors. A quick check before guests arrive? Priceless. Spot vacuuming becomes a superhero move, keeping spaces fresh and inviting.
Avoiding Common Mistakes That Lead to Odors
Even the best intentions can go awry. Neglecting to empty the vacuum bag or canister leads to odors that could knock a skunk off its feet. Regular maintenance is key. Cleaning filters and brushes prevents trapped dirt from re-entering the air. Also, spot vacuuming too slowly can leave behind residue, inviting unwelcome smells. A few minutes of diligence can save a lot of nose-wrinkling later.

WHEN TO CALL IN THE PROS: KNOWING YOUR LIMITS
1. Signs Your Spot Vacuum Needs a Professional Touch
Struggling with stubborn stains? A spot vacuum might be waving the white flag. Check for unusual noises, poor suction, or leaks. These red flags often signal deeper issues lurking beneath the surface. If the vacuum smells like burnt rubber, it’s time to call in reinforcements. A professional can diagnose problems that DIY fixes might overlook.
2. Cost-Benefit Analysis: DIY vs. Professional Help
DIY projects can feel empowering, but sometimes they lead to more headaches than solutions. Weigh the costs: a DIY repair may save cash upfront but could lead to costly mistakes down the line. Professionals, in the course of pricier, bring expertise and tools that can restore your vacuum to its former glory. Consider the value of your time and frustration when deciding which route to take.
3. Finding Reliable Cleaning Services in Your Area
Searching for trustworthy cleaning services? Start by asking friends or family for recommendations; personal experiences often shine a light on reliable options. Online reviews can also provide insights, revealing which services stand out and which fall flat. Look for companies with clear pricing and good customer service. A solid reputation often means peace of mind when handing over your vacuum for repairs.